What is the recommended protective gear for DIY wasp nest removal?
What is the best time of day to approach a wasp nest for removal?
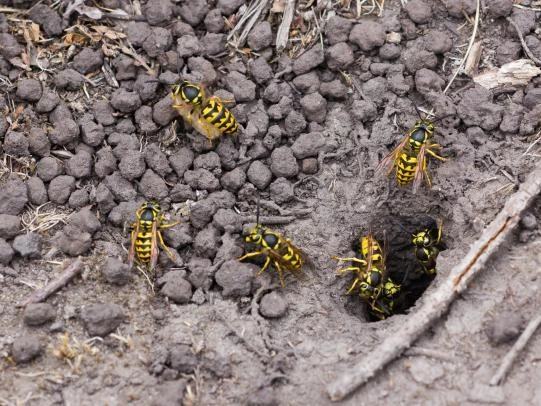
Circadian Rhythms & Wasp Behavior: Night vs. Day
1. Temperature-Dependent Metabolism
Wasps are cold-blooded insects. Their flight muscles require external heat to function efficiently.
- During the Day: Warm summer temperatures (above 20°C) allow wasps to fly at high speeds, react instantly to threats, and aggressively defend their territory.
- During the Night: As temperatures drop (especially below 15°C), their metabolic rate slows down. They become sluggish, disoriented, and unable to fly effectively, making them far easier to target.
2. Light Sensitivity & Navigation
Wasps rely on polarization of sunlight and visual landmarks to navigate.
- In the dark, they lose their ability to orient themselves.
- The Trap: If you approach a nest at night carrying a bright flashlight, the wasps will not fly back to the nest; instead, they will crawl or fly directly toward the source of the light—your face.
- Safety Tip: Exterminators use flashlights fitted with red filters or red LEDs. Insects cannot see red light waves, allowing you to illuminate the nest without alerting the colony.
DIY Wasp Protection Gear Setup
| Gear Item | Recommended Specification | Why It Is Critical |
|---|---|---|
| Body Layer | Full-body canvas bee suit OR heavy denim jeans + canvas jacket. | Standard canvas is thick enough to prevent stingers from penetrating. |
| Under-Layer | Thick hooded sweatshirt + sweatpants. | Creates a double-barrier layer; stinger cannot reach skin. |
| Gloves | Heavy-duty cowhide leather work gloves. | Wasps frequently attack hands; standard garden gloves are too thin. |
| Head & Face | Mesh bee veil zipped to suit OR safety goggles + full face shield. | Protects eyes, mouth, and neck from stings and chemical spray blowback. |
| Footwear | High-cut leather work boots. | Prevent wasps from crawling up pants or stinging ankles. |
| Cuff Seals | Industrial duct tape or heavy-duty elastic bands. | Sealing cuffs stops wasps from crawling inside sleeves and legs. |
Gravity Hazards: Ladder Safety & Panic Falls
One of the leading causes of severe injury during DIY extermination attempts is falling from heights.
- The Scenario: A homeowner climbs a ladder to spray a paper wasp nest under the eaves of their second-story roof. The moment the spray hits the nest, a few alert sentry wasps fly directly at the homeowner’s face.
- The Reaction: The homeowner panics, flails their arms to swat the wasps, loses their footing, and falls off the ladder onto the concrete below.
- The 4-to-1 Placement Rule: If you must use an extension ladder for basic household maintenance, always place the base of the ladder 1 foot away from the wall for every 4 feet of height. Keep three points of contact (two hands and one foot, or two feet and one hand) at all times.
- The Reality: Combining ladder climbing with chemical application and aggressive swarming insects is an extreme safety hazard. If a nest is located above 10 feet, do not use a ladder. Call a licensed professional who can apply dry dust safely from ground level using long, telescopic fiberglass poles.
Chemical Inhalation & Respirator Safety
Many DIY injuries occur when homeowners apply high-volume pesticide sprays in enclosed or semi-enclosed spaces, such as attics, garages, crawlspaces, or under low decks.
- The Hazard: Store-bought wasp sprays release a heavy stream of petroleum-distillate-based solvents along with active neurotoxins (such as tetramethrin or allethrin). Applying these chemicals in spaces with poor ventilation leads to rapid inhalation of toxic fumes.
- Respiratory Protection: Standard paper dust masks or particulate masks (such as N95 masks) do not filter out chemical vapors.
- The Professional Requirement: Exterminators wear NIOSH-approved half-mask or full-face respirators equipped with organic vapor cartridges (black labels) when spraying or dusting in confined spaces to prevent chemical inhalation, dizziness, and respiratory irritation.
First Aid Guide: Wasp Stings & Anaphylaxis
1. Local Reactions (Normal)
Symptoms: Immediate sharp pain, redness, mild swelling, and itching at the sting site.
First Aid: Wash the area with soap and water to prevent secondary infection. Apply a cold pack wrapped in a cloth for 10 minutes to reduce localized swelling. Apply hydrocortisone cream (0.5% or 1%) or calamine lotion to relieve itching.
2. Large Local Reactions (Slightly Severe)
Symptoms: Redness and swelling that expands significantly over 24 to 48 hours (e.g., a sting on the forearm causing the entire arm to swell).
First Aid: Keep the limb elevated. Take an oral over-the-counter antihistamine (like diphenhydramine or cetirizine) to counter the localized histamine release. Monitor the site; if the swelling continues to expand after 72 hours, consult a physician.
3. Systemic Anaphylaxis (Medical Emergency)
Symptoms: Difficulty breathing or swallowing, swelling of the tongue/throat, hives expanding across the body, dizziness, vomiting, rapid pulse, or a sudden drop in blood pressure.
First Aid: Call 911 immediately. If the victim has a prescribed epinephrine auto-injector (EpiPen), administer it into the outer thigh muscle immediately. Epinephrine constricts blood vessels to raise blood pressure and relaxes airway muscles to restore normal breathing.
Environmental Safety & Run-Off Hazards
Applying liquid insecticides outdoors presents risks to your local environment, non-target species, and the water table.
- Run-Off Pollution: Wet wasp sprays sprayed onto roof soffits or gutters can wash off during rainstorms, flowing directly into municipal storm sewers and contaminating local streams, creeks, and rivers.
- Toxicity to Aquatic Life: Active pyrethroids (like permethrin or cypermethrin) are extremely toxic to fish, frogs, and other aquatic organisms.
- Non-Target Insect Impact: Spraying active nests during the day can expose beneficial pollinators (like bumblebees, honeybees, and monarch butterflies) to toxic residues.
- The Professional Standard: Structural exterminators apply dry, micro-injected dust formulations inside cavities where they remain sheltered from rain, minimizing environmental run-off and protecting local non-target wildlife.
Scenarios Where DIY Wasp Removal is Impossible & Dangerous
1. Nest Inside a Wall Void or Siding
2. High-Altitude Nests (Above 10 Feet)
3. Severe Stinging Insect Allergies
Step-by-Step DIY Wasp Treatment Protocol
Phase 1: Daytime Reconnaissance
Phase 2: Nighttime Preparation
Phase 3: The Approach
Phase 4: Chemical Application
Phase 5: The Retreat
Do not stand around to inspect the results. Walk away calmly along your planned exit route. Do not run, as running increases the risk of tripping. Go indoors immediately and monitor the nest from behind a window. Check for activity the following morning before approaching the area.